


- Stock: In Stock
- Product code: 00-00012985
- Weight Brutto: 5.50kg
- SKU: PKG-FS1-FB-PS-01
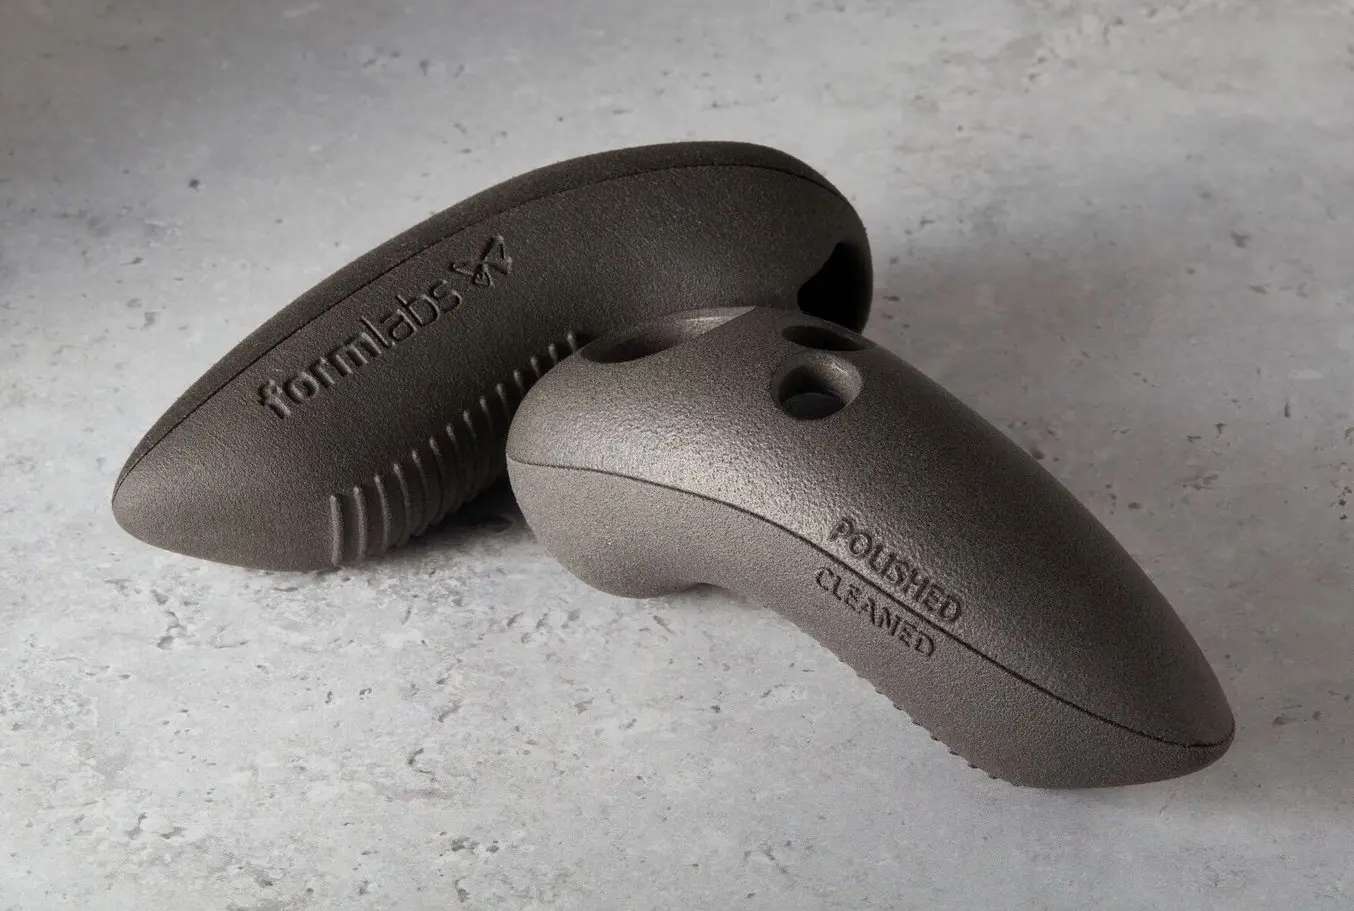
Formlabs Fuse Blast Polishing System is a drop-in upgrade module for the Fuse Blast that cleans and polishes SLS printed parts in a single automated step. Through impact polishing with conditioned media, it delivers a smooth, semi-gloss, scuff-resistant, and dye-ready surface finish — eliminating the need for a separate blasting pass after the Fuse Sift. Compatible with any Fuse Blast unit and requiring a minimum blasting pressure of 60 PSI, polishing media lasts over 100 cycles with no observed breakdown.
| Blast Polishing Time | 20–60 minutes |
|---|---|
| Polishing Media Lifetime | > 100 blasting cycles |
| Minimum Blasting Pressure | 60 PSI |
| Water Tank Volume | 750 mL |
One Step from Powder Cake to Consumer-Ready
Standard glass-bead blasting removes loose powder and Surface Armor but leaves parts with a rough, matte texture — acceptable for prototyping but rarely for customer-facing applications. The Polishing System replaces that workflow entirely. Parts go from the Fuse Sift directly into the Fuse Blast, and a single cycle both cleans and polishes them to a semi-gloss finish.
The mechanism is impact polishing, functionally similar to shot peening in metalworking. The Polishing Module doses a small amount of Polishing Agent solution into the blast stream, conditioning the ceramic polishing media. This conditioned media compacts the part surface rather than abrading it — surface roughness decreases without removing material. The result is a smooth, uniform finish that accepts dye evenly and resists surface scuffing during handling.

Consumer-Grade Surface Finish
The semi-gloss output meets the expectations of end-use consumer products, orthotics, medical device housings, and design validation samples. Because the process compacts rather than melts or abrades the surface, dimensional accuracy remains intact — critical for parts with tight tolerances or threaded features.
The polished surface is dye-ready without additional preparation, which shortens the finishing pipeline for coloured production parts. Teams printing orthotic insoles, eyewear frames, or custom enclosures can move directly from polishing to dyeing in a single day.
Adaptive Airflow for Lower-Capacity Compressors
The Polishing System recommends a minimum blasting pressure of 60 PSI. That is higher than the standard glass-bead mode, and not every workshop compressor can sustain it continuously. The Fuse Blast's Adaptive Airflow feature addresses this: if the compressor cannot keep up, the cycle pauses automatically while the tank recharges, then resumes — delivering a fully hands-off experience regardless of compressor capacity.
Long-Life Media and Low Running Costs
Formlabs Polishing Media is a ceramic-based compound that does not break down during use. Testing shows no measurable degradation after 100+ blasting cycles, which means media replacement is not a recurring cost driver. The Polishing Agent — 7 mL diluted in 750 mL of tap water — is equally economical: a single 120 mL bottle lasts approximately 130 cycles at 45-minute run times. Deionized water must not be used; standard tap water is required.
Installation Overview
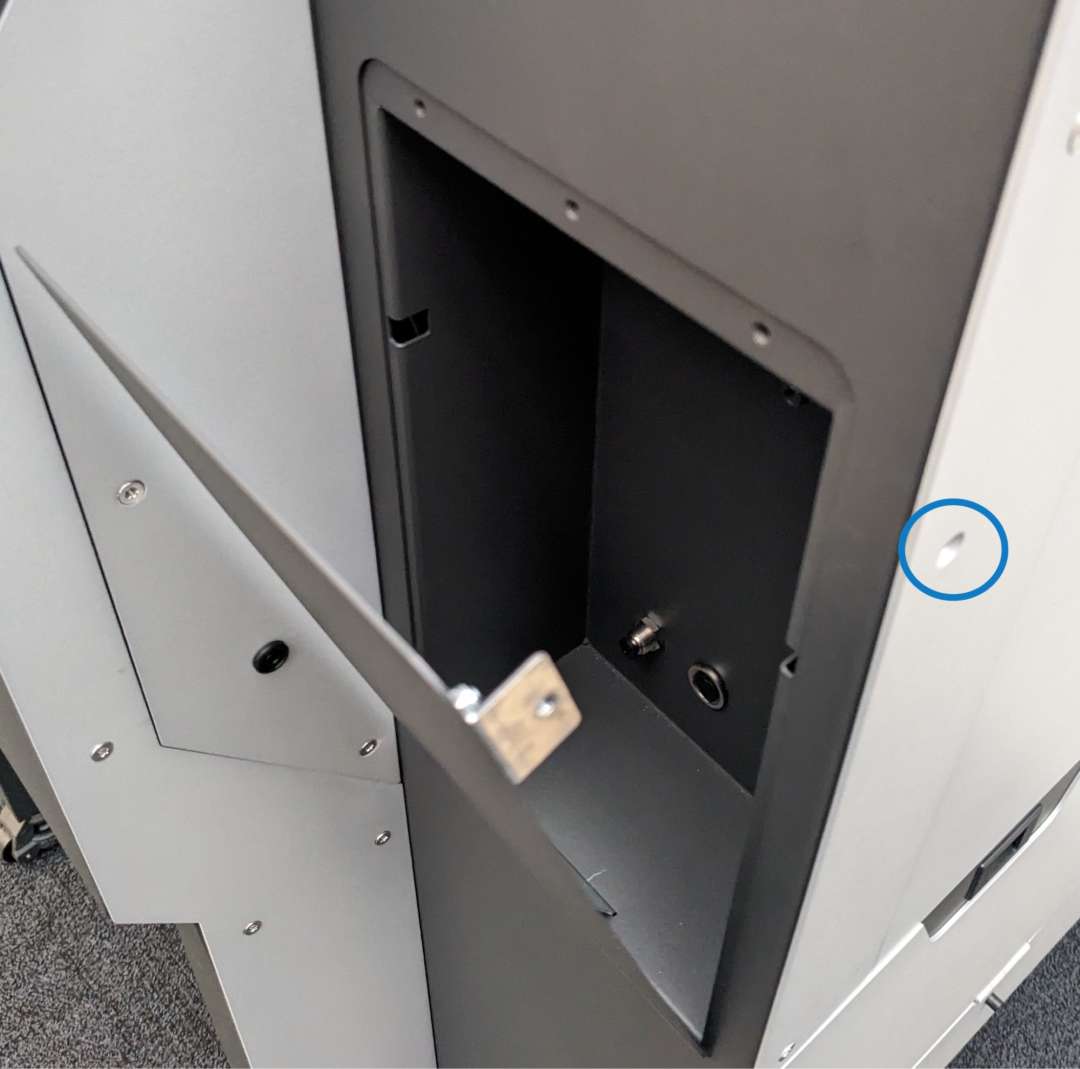
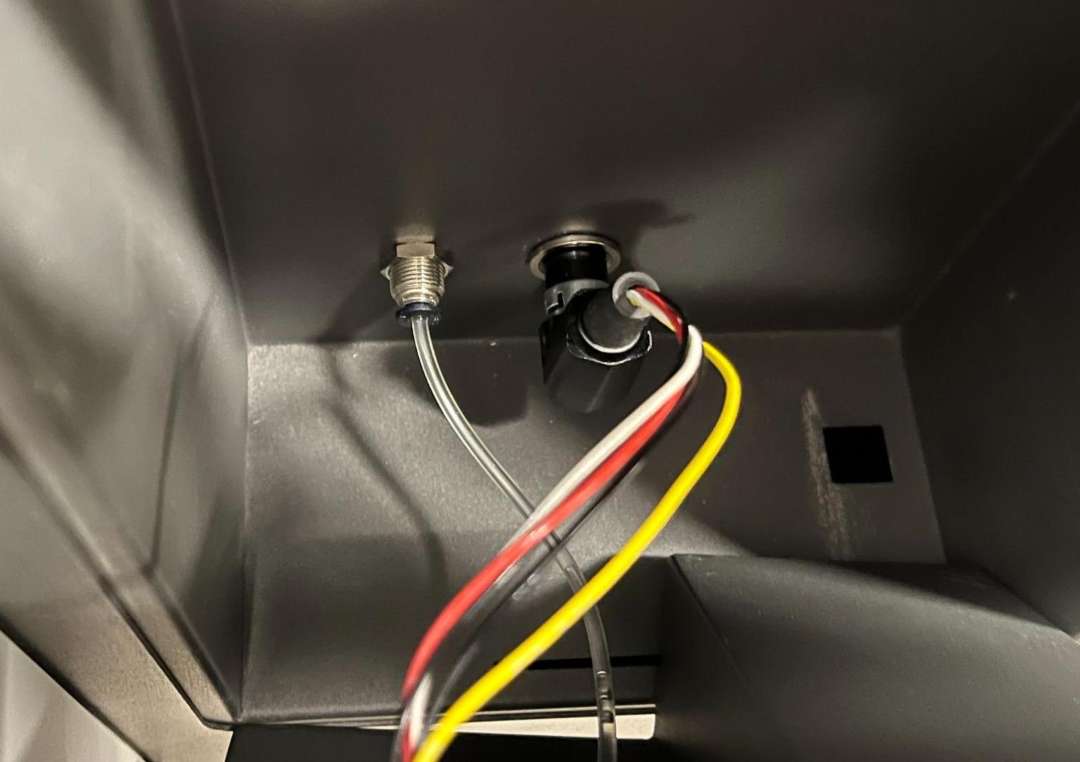
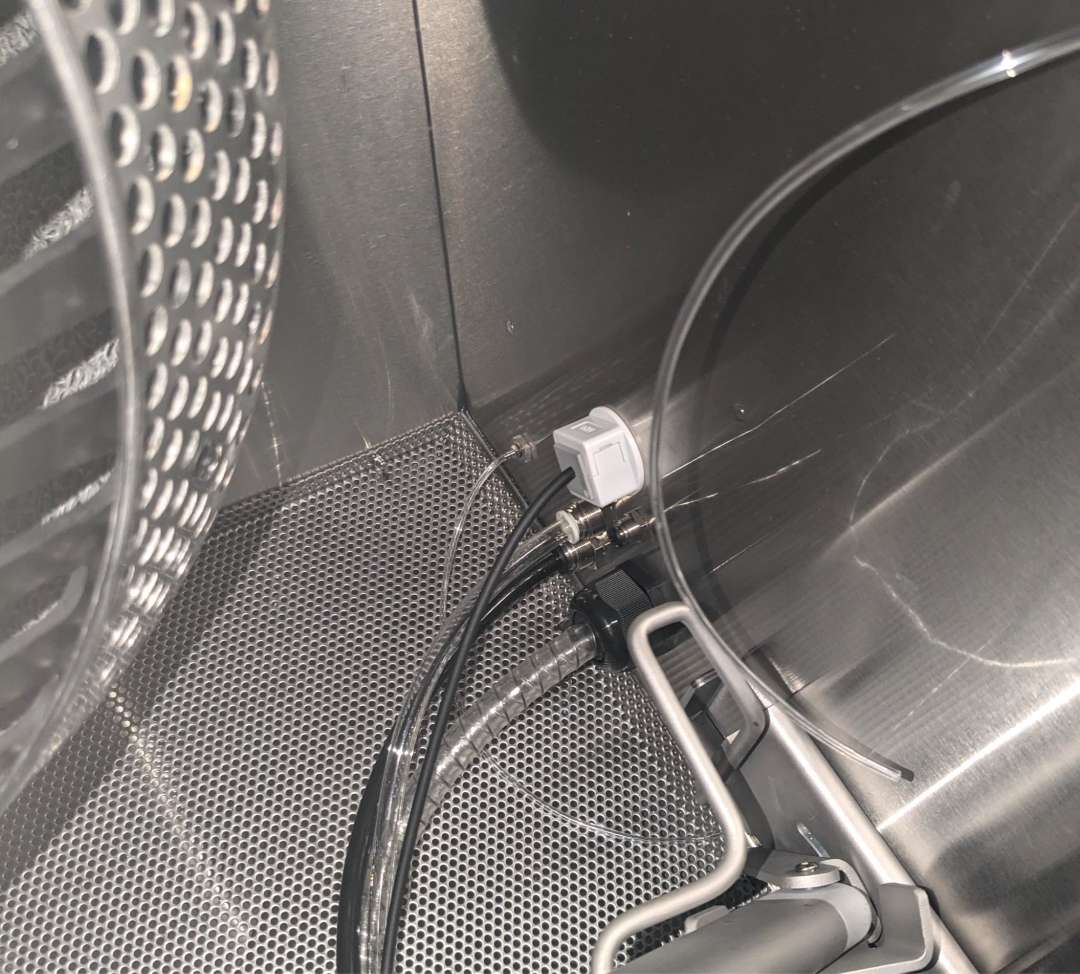
The Polishing Module slides into a dedicated cavity on the Fuse Blast. Two connections are required: an electrical cable and a water tube. Both use tool-free quick-connect fittings. The image below shows the polishing cavity with the front panel removed, ready for module insertion.
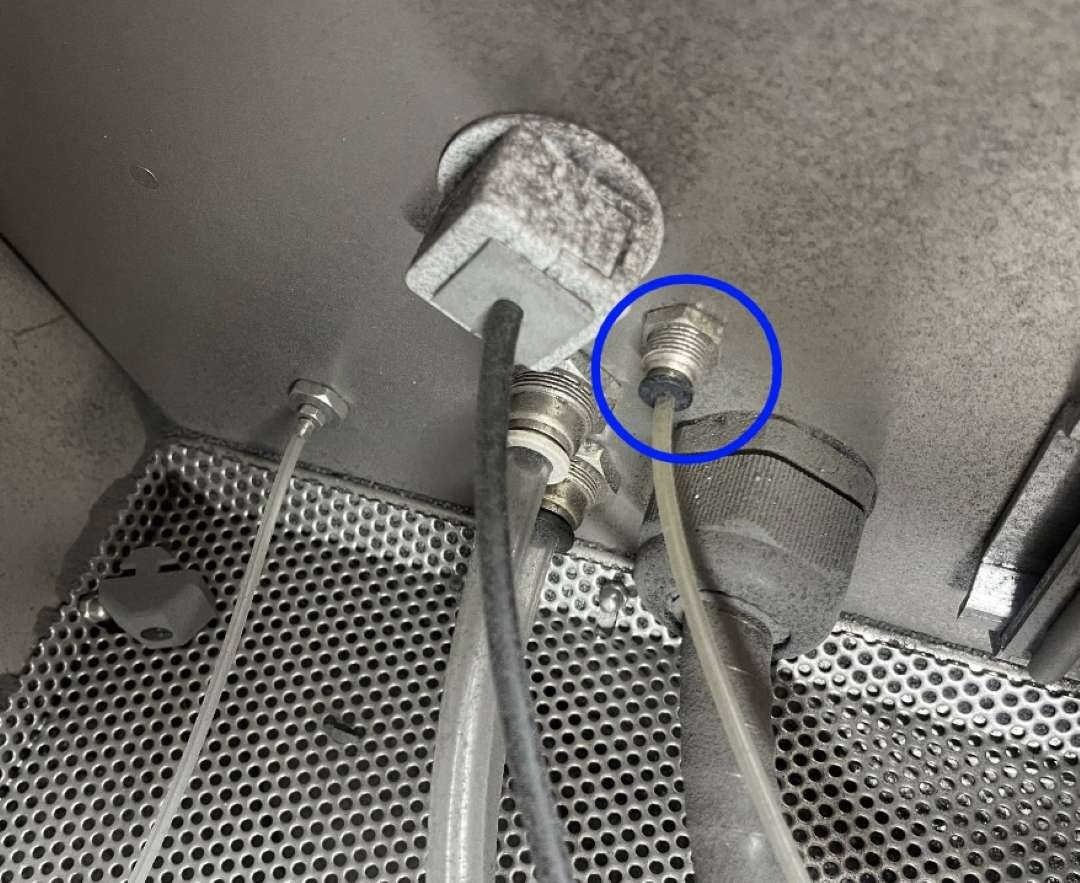
The water tube connects through a dedicated port inside the cavity. Push the plug into its fitting until it clicks.
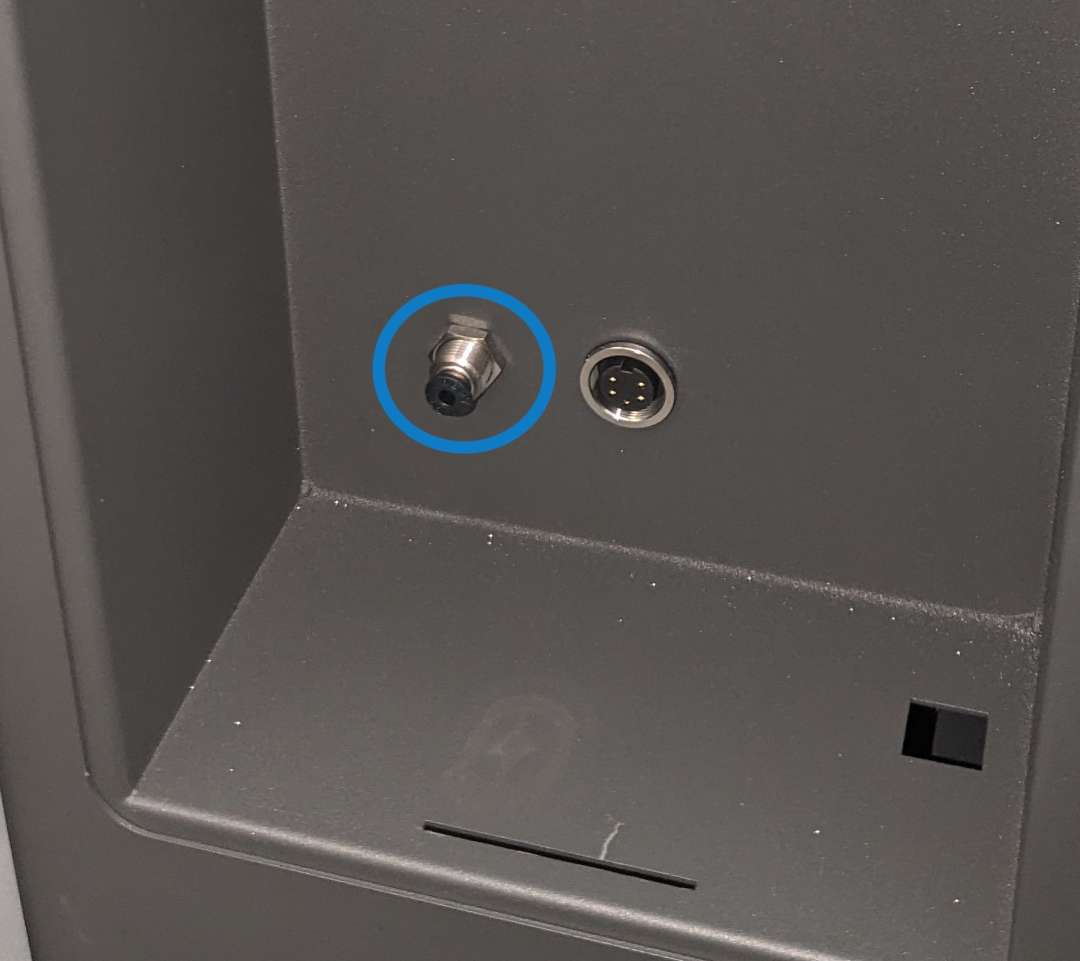
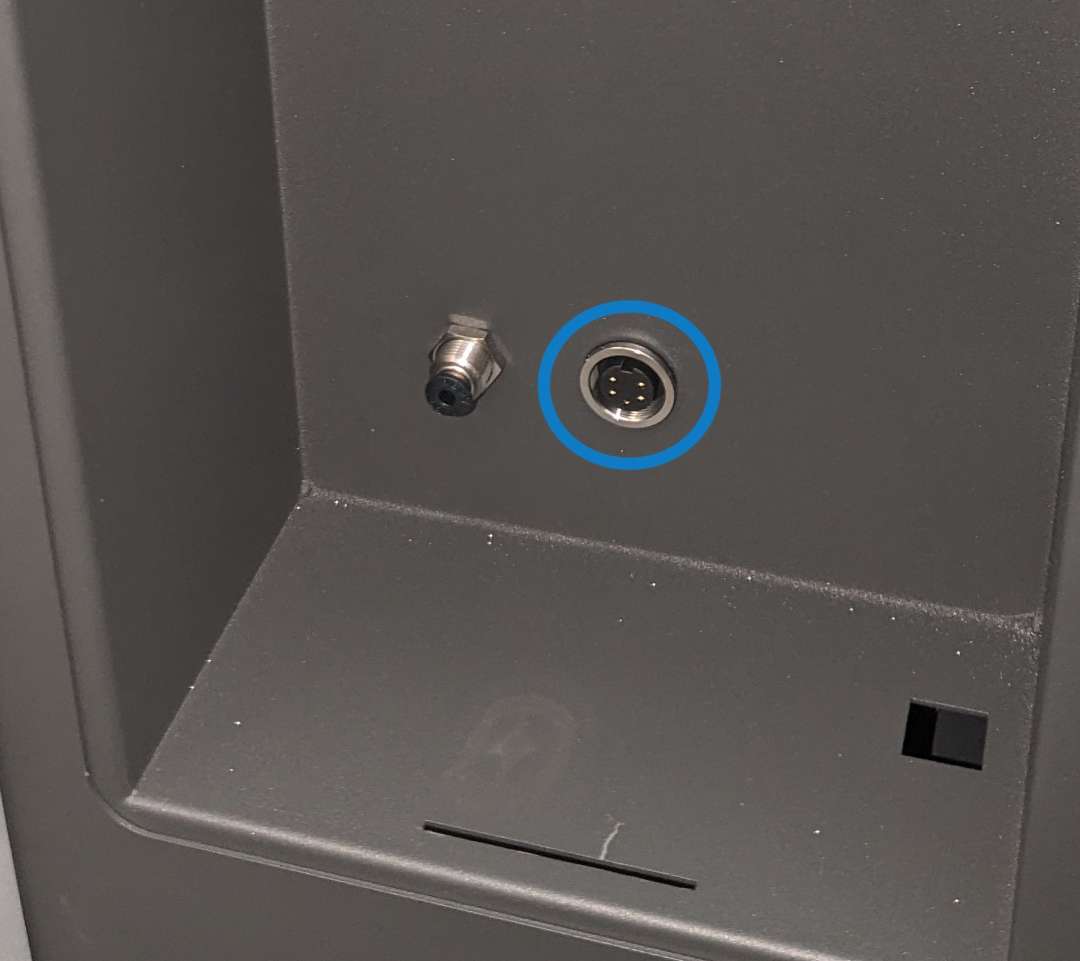
The electrical cable plugs into a socket at the rear of the cavity. A locking ring secures the connection against vibration during operation.
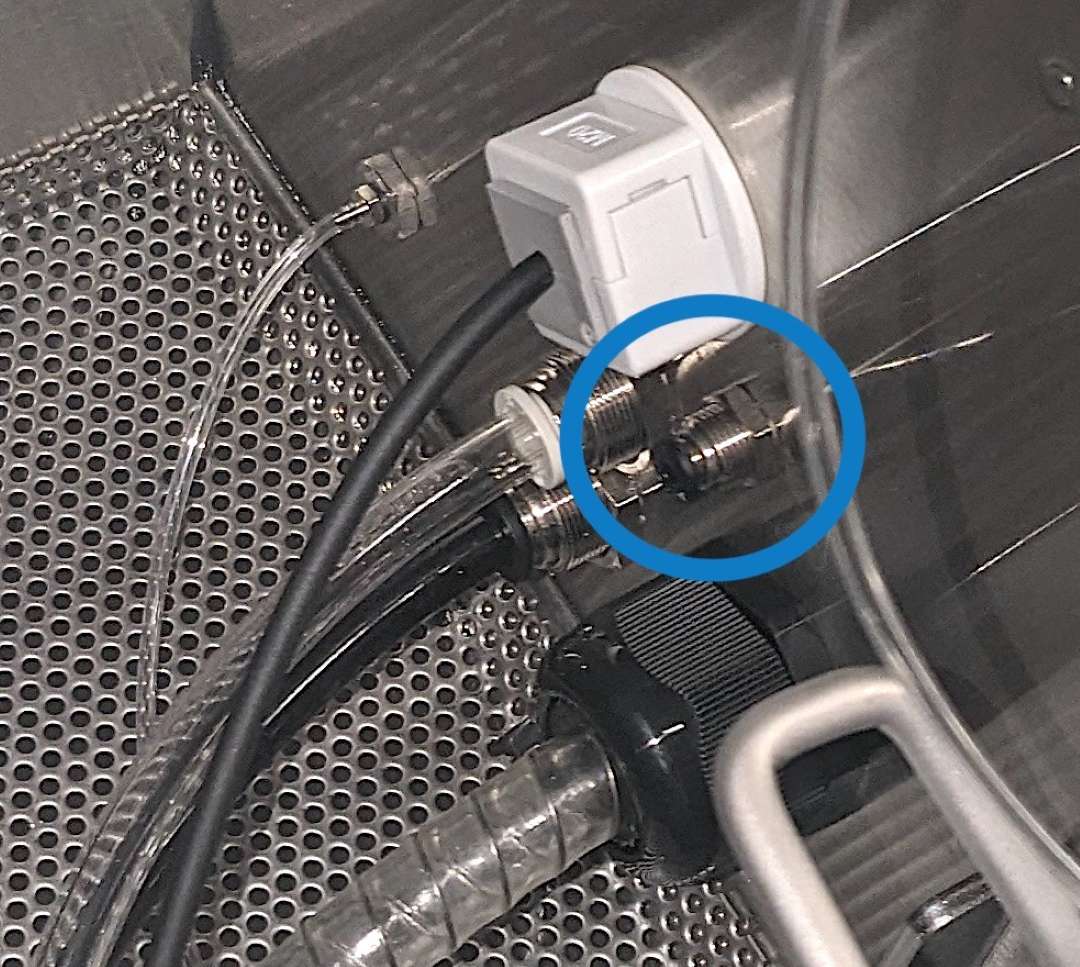
Once both connections are seated, the cable and water tube route cleanly through the cavity before the module slides in.
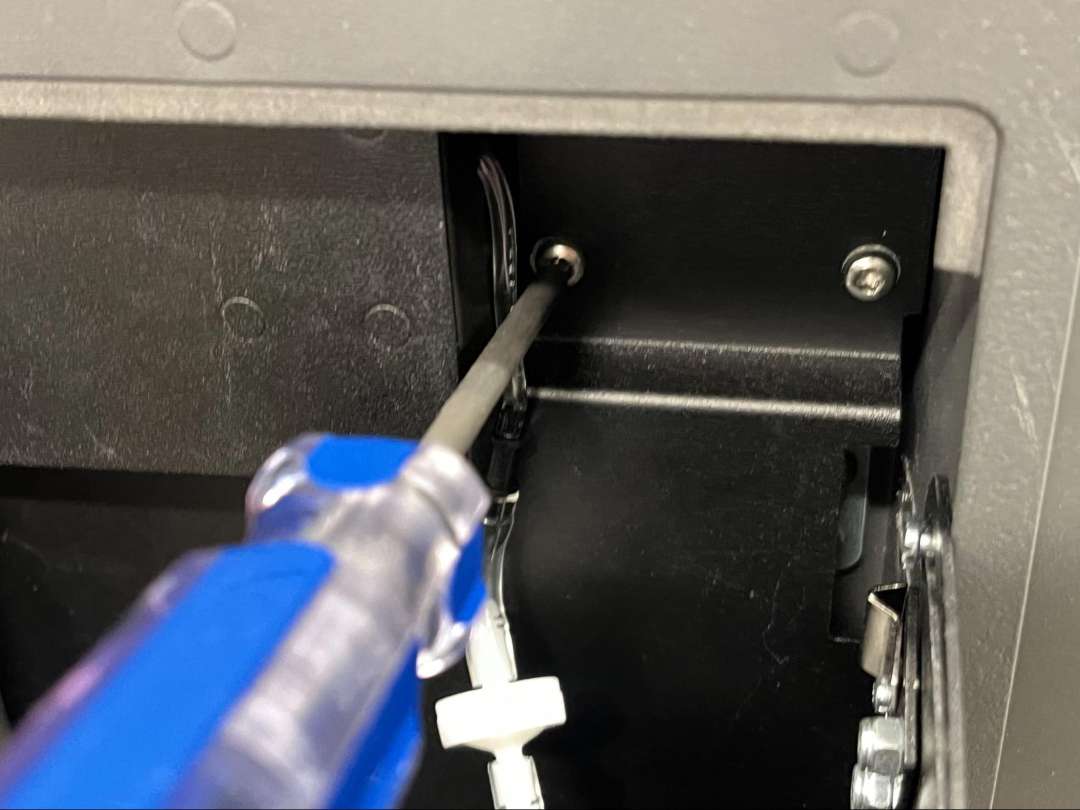
After sliding the module in, tighten the captive grounding screw with a Philips screwdriver until snug.
The assembled Polishing Module includes the water tank holder, pump, and injection dosing system. The water tank slides into the front of the module.
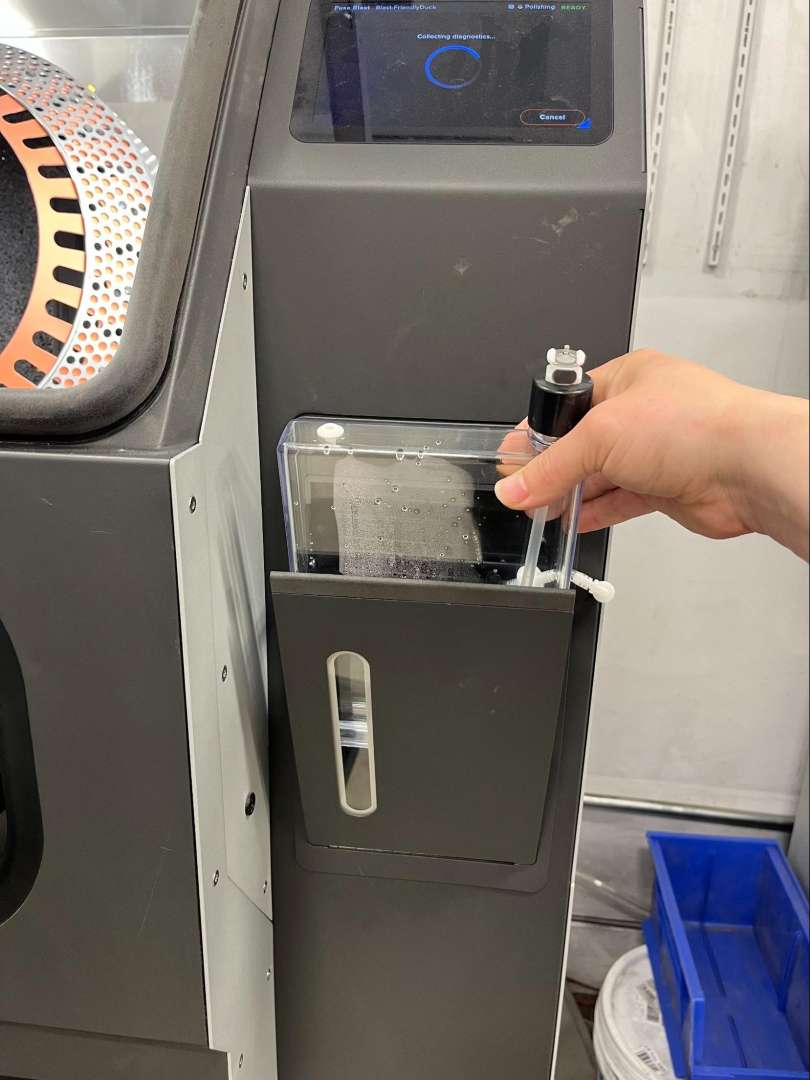
The water feed line connects to the tank via a quick-connect plug at the top of the cap. Press until it clicks into the socket.
Injection Nozzle Setup
The Polishing System requires replacing the standard blast gun nozzle with the included injection nozzle assembly. If a 4 mm orifice is installed, it must be swapped for the 3 mm orifice supplied with the system. The diagram below shows the correct assembly order of the nozzle holder, nozzle, and washer.
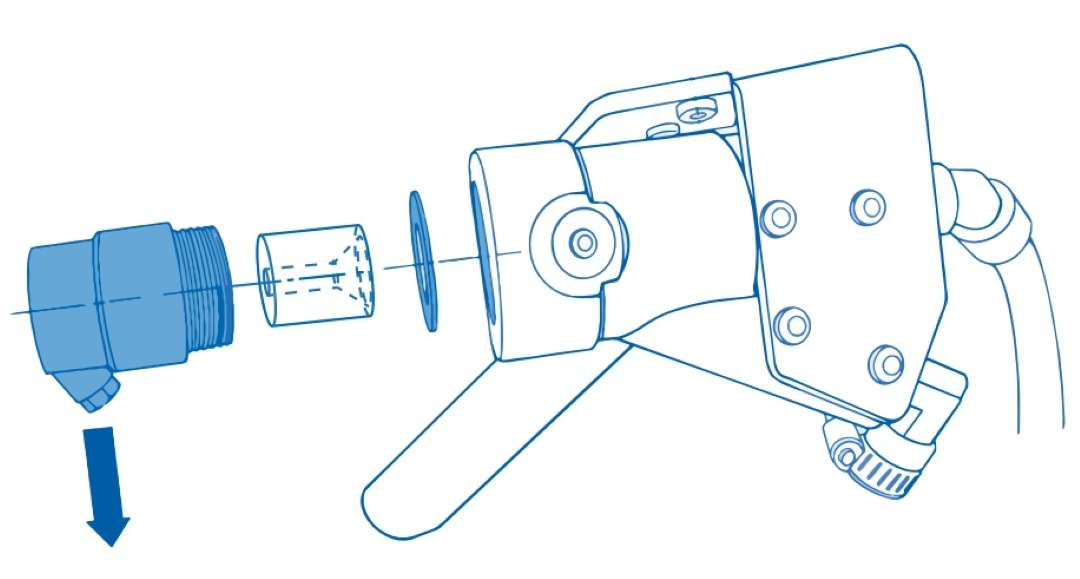
Before installing the new nozzle, unscrew the existing white nozzle holder from the front of the blast gun.
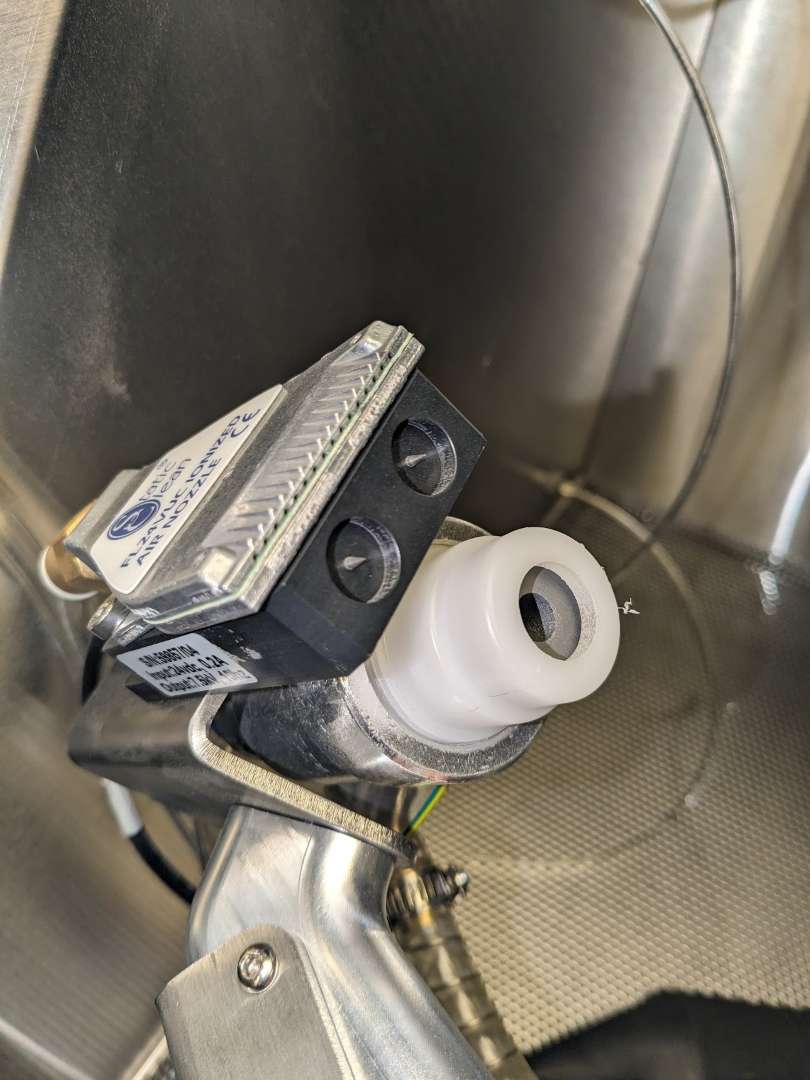
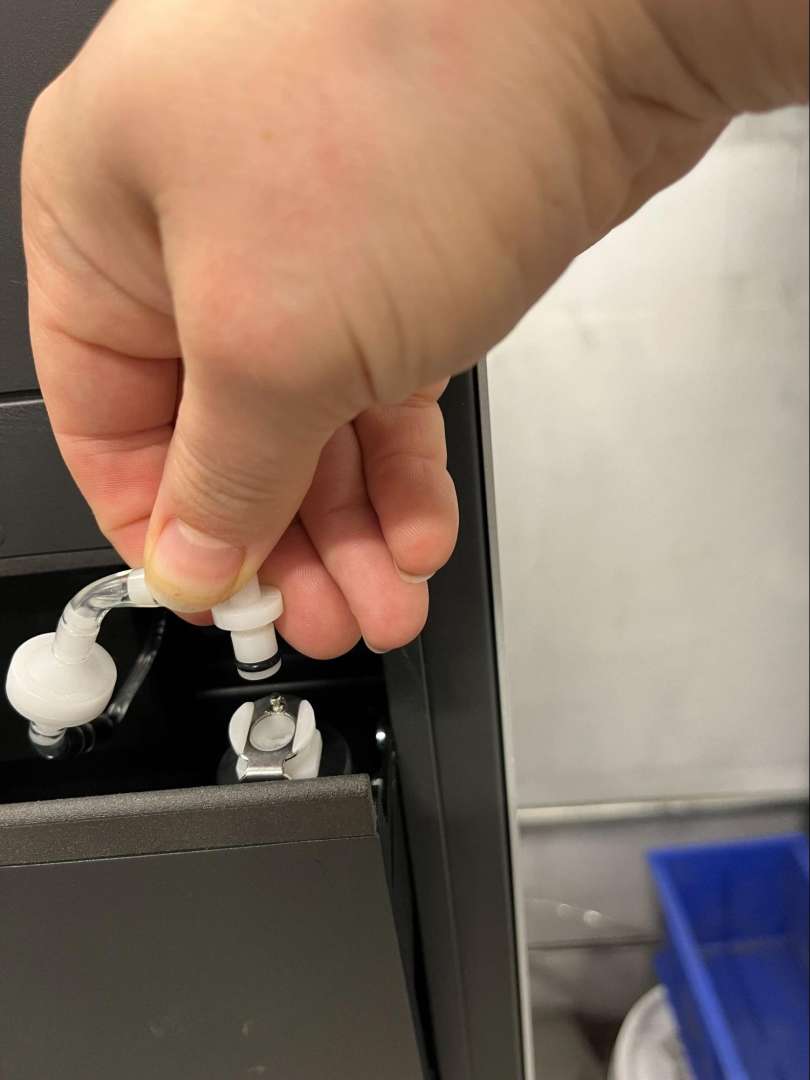
Inside the blasting chamber, the injection nozzle tube connects to a port on the right wall. The Fuse Blast ships with a silver stud in this port — remove the stud before inserting the tube.
The silver stud must be removed before the injection tube can be seated.
Once the stud is removed, insert the injection nozzle tube into the port and secure it.
Tech Tip: When refilling the water tank, always empty and rinse it first to prevent Polishing Agent saturation. Add exactly 7 mL of Polishing Agent to 750 mL of tap water — excess agent causes media clumping and may require a full media replacement. Keep the flow rate at the recommended 2 mL/min unless directed otherwise by Formlabs support. Avoid gaps between 0.5 mm and 1.5 mm in part designs, as polishing media can become lodged in features of this size.
Technical Specifications of Formlabs Fuse Blast Polishing System
Performance
| Blast Polishing Time | 20–60 minutes |
|---|---|
| Polishing Media Lifetime | > 100 blasting cycles (no breakdown observed) |
| Blasting Pressure | 60 PSI minimum recommended |
Polishing Agent & Water System
| Polishing Agent Lifetime | 7 mL diluted in 750 mL of water; one 120 mL bottle lasts ~130 cycles @ 45 minutes |
|---|---|
| Recommended Flow Rate | 2 mL/min |
| Water Tank Volume | 750 mL |
Compatibility
| Compatible Post-Processing Unit | Fuse Blast |
|---|---|
| Printer Compatibility | Fuse 1, Fuse 1+ 30W |
What's in the Box
- Fuse Blast Polishing Module (1×)
- Fuse Blast Polishing Media Jugs (2×)
- Fuse Blast Polishing Agent Bottle (1×)
- Fuse Sift Glovebox Panel
- Fuse Blast Polishing Media 4 L (2.5 kg)
- Fuse Blast Polishing Agent 115 mL
- Fuse Blast Polishing Mesh
How to Install the Fuse Blast Polishing System
Step-by-step guide to installing the Polishing Module on your Fuse Blast, connecting the water and electrical lines, replacing the blast gun nozzle, and preparing the system for first use.
Step 1: Power Down and Open the Cavity
Flip the breaker switch on the back of the Fuse Blast to OFF and unplug the power cable. Wait five minutes. Remove the T15 Torx screw and the front panel from the polishing cavity.
Step 2: Connect Water Tube and Power Cable
Insert the water tube plug into its fitting inside the cavity. Plug the Polishing Module electrical cable into the socket at the rear of the cavity and turn the locking ring to secure it.
Step 3: Insert and Ground the Module
Slide the Polishing Module into the cavity. Tighten the captive grounding screw with a Philips screwdriver until snug.
Step 4: Prepare the Water Tank
Fill the water tank with tap water until 80% full — do not use deionized water. Add 7 mL of Formlabs Polishing Agent, close the cap, and gently agitate to mix. Insert the tank into the module and connect the quick-connect water feed line.
Step 5: Replace the Blast Gun Nozzle
Unscrew the white nozzle holder from the blast gun. Remove the ionizer (2× T25 Torx screws). Insert the new nozzle into the included nozzle holder with the wide opening facing the threaded end. Screw the replacement nozzle holder into the blast gun, attach the injector hose (8 mm wrench), and reinstall the ionizer.
Step 6: Connect the Injection Tube
Locate the injection nozzle port on the right wall of the blasting chamber. Remove the silver stud, insert the injection nozzle tube, and secure it with the included zip ties.
Step 7: Install Polishing Mesh and Add Media
Remove the standard Fuse Blast Hopper Mesh and replace it with the included Fuse Blast Polishing Mesh. If the Fuse Blast contained non-polishing media, empty the hopper completely before adding Formlabs Polishing Media.
Step 8: Update Firmware and Enable Polishing
Update the Fuse Blast firmware via PreForm (version 3.34.0 or later). On the Fuse Blast touchscreen, navigate to Settings → Maintenance → Polishing and toggle Polishing to ON. Tap the water drop icon next to Prime Pump to flush the water lines before first use.
Frequently Asked Questions — Fuse Blast Polishing System
Is the Fuse Blast Polishing System compatible with all Fuse Blast units?
Yes. The Polishing System is compatible with any Fuse Blast. A firmware update via PreForm 3.34.0 or later is required to enable the Polishing toggle on the touchscreen. The system processes parts printed on the Fuse 1 and Fuse 1+ 30W.
Can I use the Polishing System directly after the Fuse Sift without a separate blast pass?
Yes. The Polishing System both cleans and polishes parts in a single automated step. Parts go from the Fuse Sift directly into the Fuse Blast with the Polishing System enabled — no separate glass-bead blasting pass is required.
How often does the polishing media need to be replaced?
Formlabs testing shows no measurable media breakdown after more than 100 blasting cycles. Under normal operating conditions, the ceramic polishing media does not require periodic replacement. The Polishing Agent (7 mL per 750 mL of water) is the primary consumable, with one 120 mL bottle lasting approximately 130 cycles at 45-minute run times.
What type of water should I use in the Polishing System?
Use standard tap water. Do not use deionized water, as it can interfere with the Polishing Agent chemistry. Fill the tank to 80% capacity, add exactly 7 mL of Polishing Agent, and agitate gently before use.
What happens if my compressor cannot sustain 60 PSI continuously?
The Fuse Blast's Adaptive Airflow feature pauses the polishing cycle while the compressor tank recharges, then resumes automatically. This allows lower-capacity compressors to handle the 60 PSI requirement without manual intervention, though total cycle time will increase.
Can I switch between polishing media and standard glass blasting media?
Yes, but you must fully empty the media hopper before switching. The standard Fuse Blast Hopper Mesh and the Polishing Mesh are also different — swap the mesh to match the media type in use. Mixing media types degrades finish quality and may clog the system.
Why Choose EXPERT3D?
EXPERT3D has been a specialist in 3D technology since 2012, serving engineering teams and production departments across Spain with technical expertise and hands-on support. We stock Formlabs SLS equipment and consumables including the Fuse Blast Polishing System and provide rapid shipping across Spain and Europe. Our team can advise on post-processing workflows, compressor compatibility, and material selection. Order directly from our online store with transparent pricing in EUR (€) and full official warranty coverage.


")


 & FDK Bundle – 1-Year Service Plan Included")


